Becoming a YouTuber or Podcaster is on a trend these days and for that, you need to set up an external mic in Windows 10. It is one of the most stable versions of the operating system from Microsoft to date. If you are connecting any external accessories or using any inbuilt features within Windows, you can expect an almost bug-free experience with Windows 10 than previous versions.
Talking about external accessories, one of the most useful accessories you can add to your Windows 10 computer is an external microphone. Most of us own a laptop these days, and they do come with an inbuilt microphone. However, with an external microphone, you can get a better experience while doing tasks such as voice/video calls, gaming, or even while using the speech recognition features available within Windows 10.
If you already own a microphone and is unaware of how to set up an external mic in Windows 10, then today we are here with a detailed tutorial taking you through the steps required to set up an external microphone with your Windows 10 computer.
There are two types of microphones available in the market. You can purchase external microphones that connect to your computer via USB or Bluetooth external mics for Windows 10.
Regardless of the type of external mic for Windows 10 you purchase, the first task to set up your mic on Windows 10 is to connect it with your computer and get the compatible drivers installed.
Whenever you connect a new device, the drivers for the device should be automatically installed on your Windows 10 computer. However, in case the drivers don’t get installed automatically, you will have to visit the official website of your microphone manufacturer and download/install the drivers compatible with your microphone version.
Steps to set up your external microphone in Windows 10:
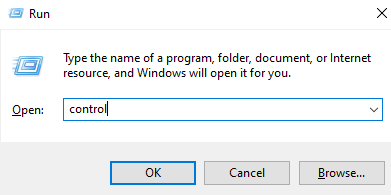
- Click on the “Windows” key + “R” key to open the RUN window on your computer.
- Type “Control” within the RUN window and press the “Enter” key on your keyboard.
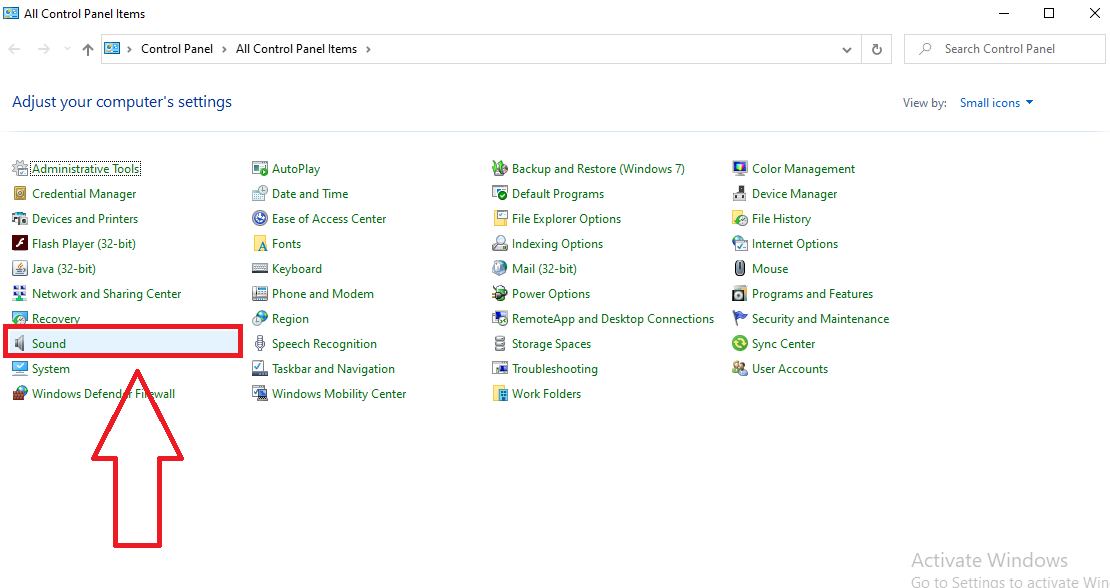
- Within the Control Panel window that launches, click on the option titled “Sound”.
- A new window will popup.
- Within this new window, click on the “Recording” tab displayed on the top of the window.
- Now, click on the option that says “Set up a microphone”.
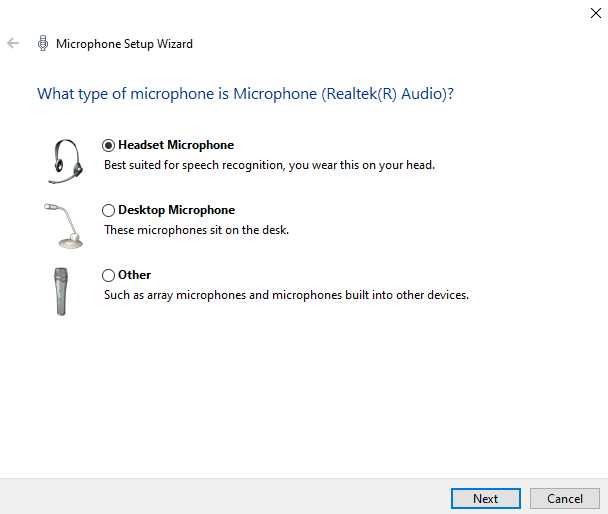
- In the next screen, select the type of microphone you have connected to the computer and click on the “Next” button placed in the bottom right corner of the window.
- You will now be displayed a screen briefing on how to properly place the microphone to test it in Windows 10.
- Click on the “Next” button.
- In this screen, you will be able to see a sentence which you have to read out aloud to test the microphone in Windows 10.
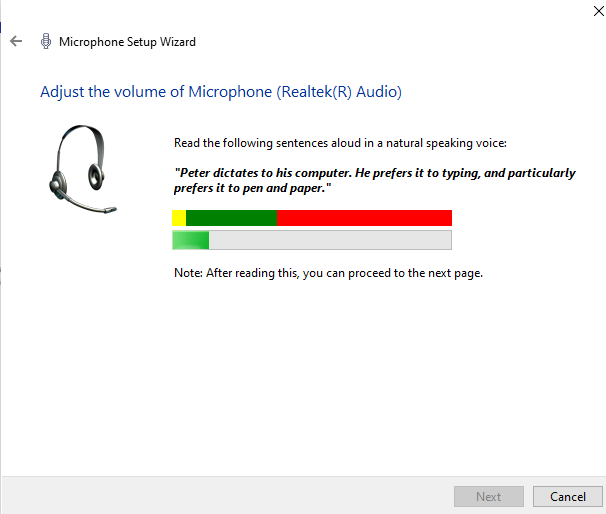
- If the testing is successful, click on the “Next” button. If you cannot see your voice being detected by your computer, check your microphone connection with the computer and try again.
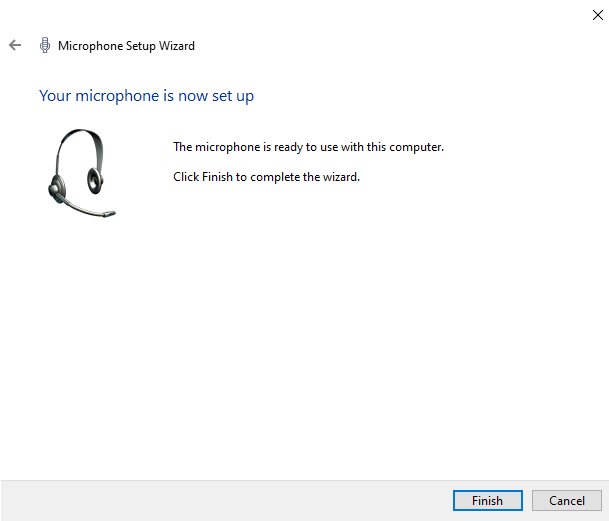
- Once successfully tested, you can click on the “Finish” button and complete the setup of the external mic with your Windows 10 computer.
Conclusion: What To Do If Your Mic Wasn’t Detected by Windows 10?
In case you weren’t able to successfully test your microphone in Windows, make sure that the mic you have is not defective. Then check if whether your mic was muted or if it wasn’t connected properly.
Finally, you can try restarting your Windows 10 computer and connecting your microphone then, as it might help you solve the issue.
We hope this article was easy for you to understand. In case of any queries, feel free to ask us by leaving a comment below.

I have followed all your instructions as this is exactly my problem, but the option to “Set up a microphone” is not enabled in the sound section of my control panel. Is this because I am using a non-activated version of Windows 10. Is that the fundamental problem? My external Mosotech lav mic is not showing up anywhere! So exasperating!
It can happen because of two possible reasons.
1. Faulty hardware where the port is somehow damaged or not working anymore so the computer is not able to detect the hardware.
2. Could be a driver issue. Look for the right sound drivers for your system and try again.
Non-activated Windows has nothing to do with this.