We store a lot of personal and official data on our computers and that’s why one should know how to hide and unhide files folders in Windows 10. Even when stored in our own personal Windows login account, such sensitive data can be subjected to privacy concerns as anyone who gets access to your Windows account on your computer can view all these files.
One of the best ways to make sure that any sensitive file folders within your computer aren’t accessible to anyone else is by hiding them. The Windows operating system has allowed users to hide their files & folders for a very long time now.
If you are interested in knowing how you can hide and unhide file folders in Windows 10 without facing any hassles, today we bring you a detailed guide on the same.
How to Hide/Unhide File Folders in Windows 10
There are several methods you can follow to hide/unhide file folders in Windows 10. Below are some of the most convenient ones.
How to Hide/Unhide File Folders in Windows 10 using Command Prompt
With the help of the command prompt, you can easily hide/unhide files and folders in Windows 10. Here’s how you can hide files using cmd in Windows 10:
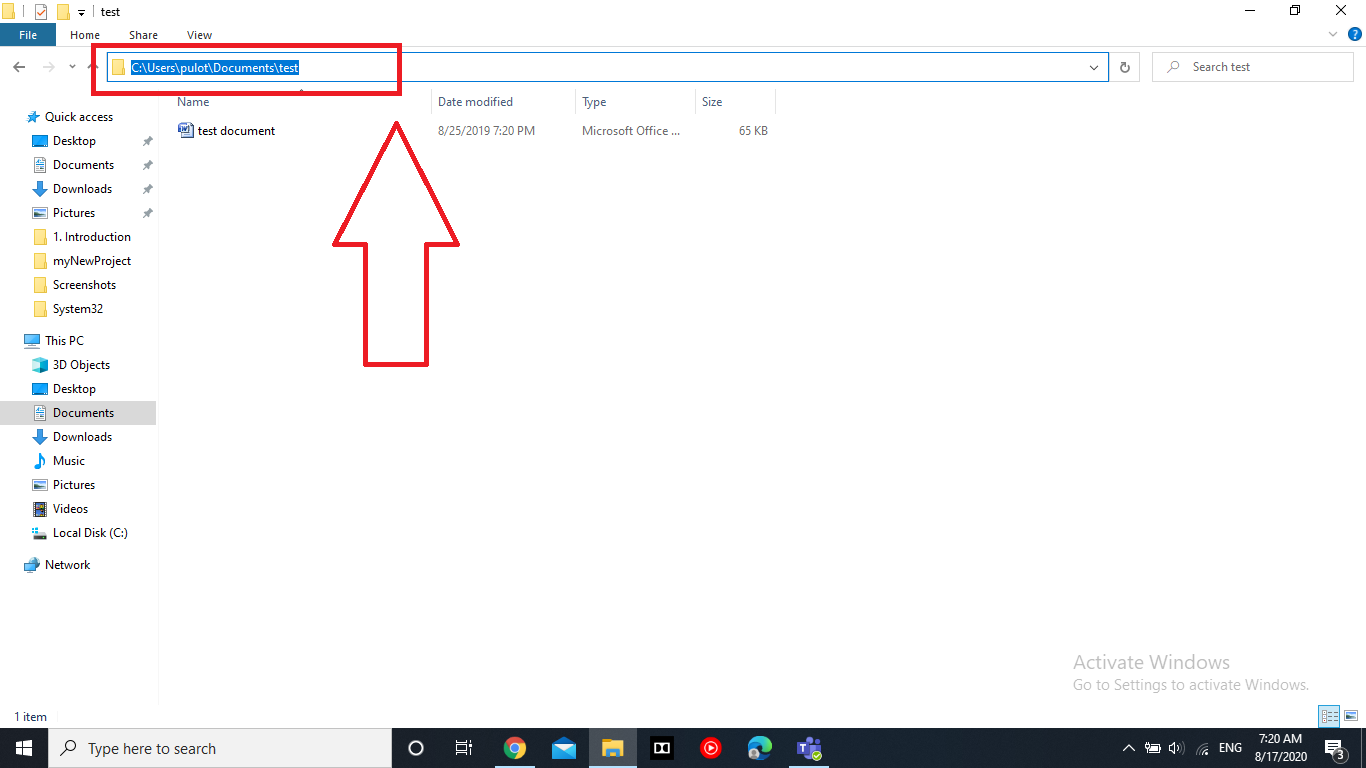
- First of all, you need the full pathname of the file along with its extension to hide/unhide using cmd. To get the full pathname correctly, navigate to the file you wish to hide using the “File Explorer” application on your Windows 10 computer. Now, click on the top navigation bar once to highlight the complete directory. Finally, right-click on your mouse and click on the “Copy” option to copy the full file path.
- Now, click on the “Windows” key + “R” key to bring up the Run window.
- Within the Run window, type “cmd” and press “Enter” on your keyboard.
- In the command prompt window, type the below command
Attrib +h “<filepath here>”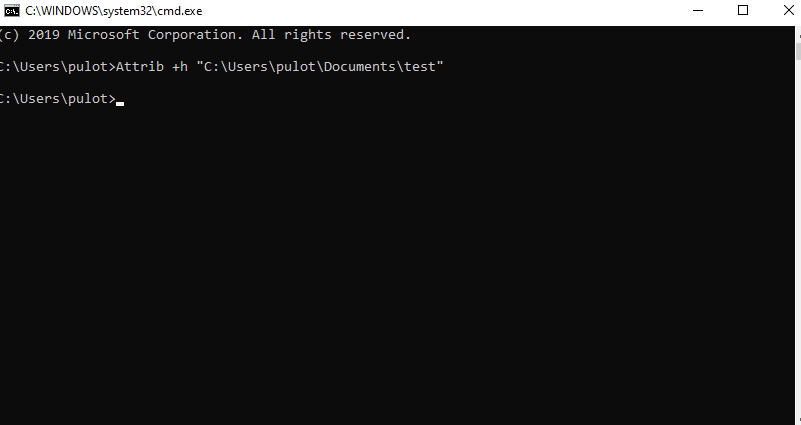 Replace <filepath here> with the file path you copied in step 1. Make sure to paste the file path within the “” quotes.
Now, steps to unhide files using command prompt in Windows 10:
- Press the “Windows” key + “R” key to launch the Run window.
- Type “cmd” and press the “Enter” key.
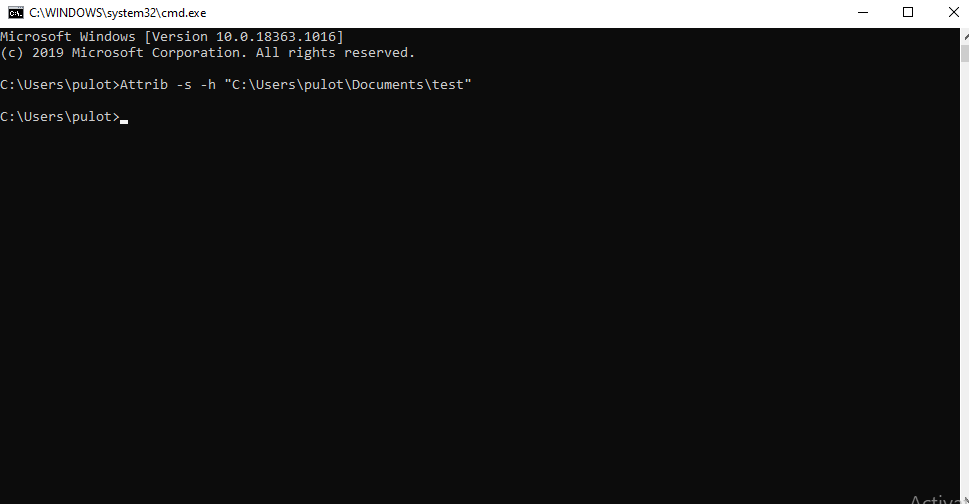
- Within the command prompt window, type the below command:
Attrib -s -h “<filepathhere>”
Replace <filepathhere> with the actual full pathname of the file you wish to unhide.
How to Hide/Unhide Files and Folders in Windows 10 using File Explorer
It is also possible to hide/unhide files & folders using the File Explorer application in Windows 10. Below is how you can hide files using File Explorer in Windows 10.
- Press the “Windows” key + “E” key to launch the File Explorer.
- On the top navigation bar of the File Explorer, switch the tab to “View”.
- Select the file/folder you wish to hide.
- From the top menu options under the “View” tab, select the “Hide Selected Items” option.
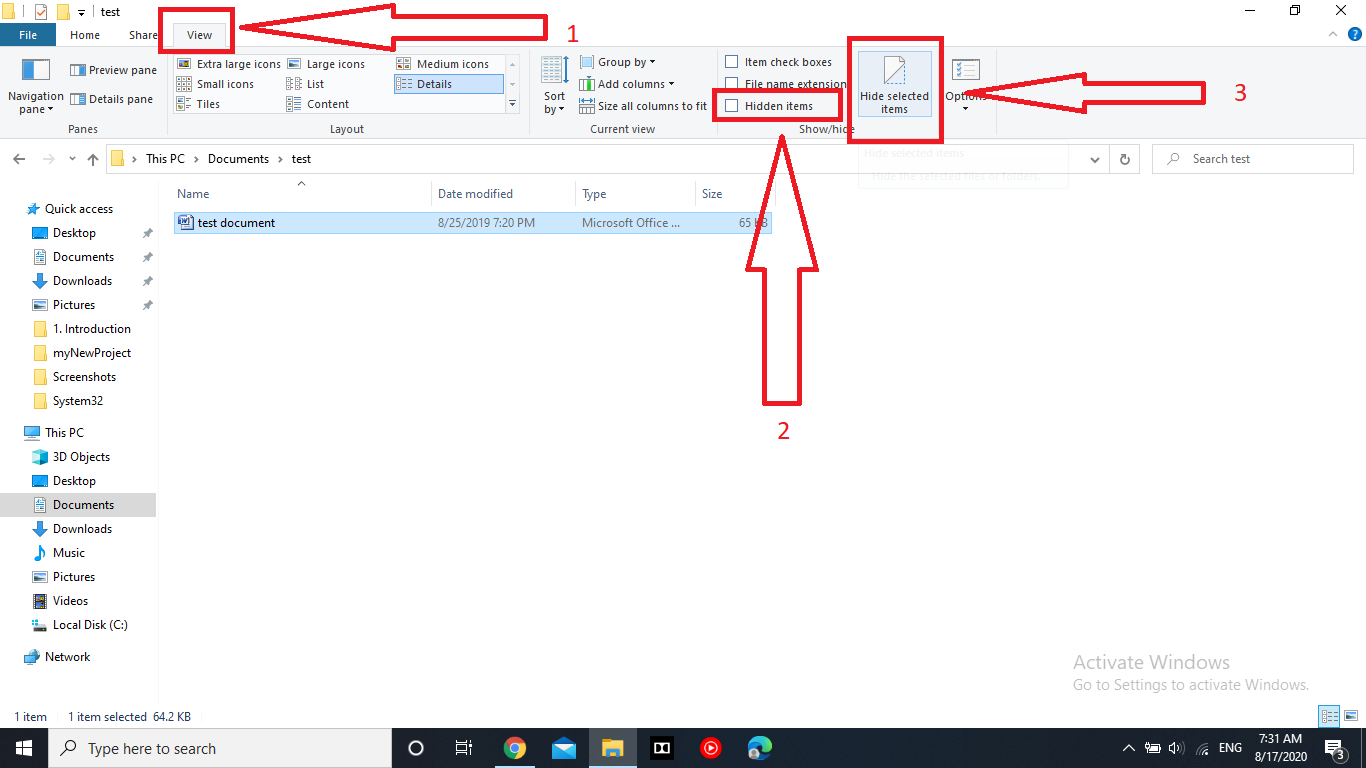
- When asked for confirmation, click on “OK”.
And that is it. You have now hidden the selected files/folders. Now, to unhide them, below are the steps to follow.
- Launch the File Explorer window by pressing the “Windows” key + “E” key on your keyboard.
- Navigate to the location where your hidden files/folder is stored.
- Switch to the “View” tab on the top of the File Explorer window.
- Select the hidden files/folders.
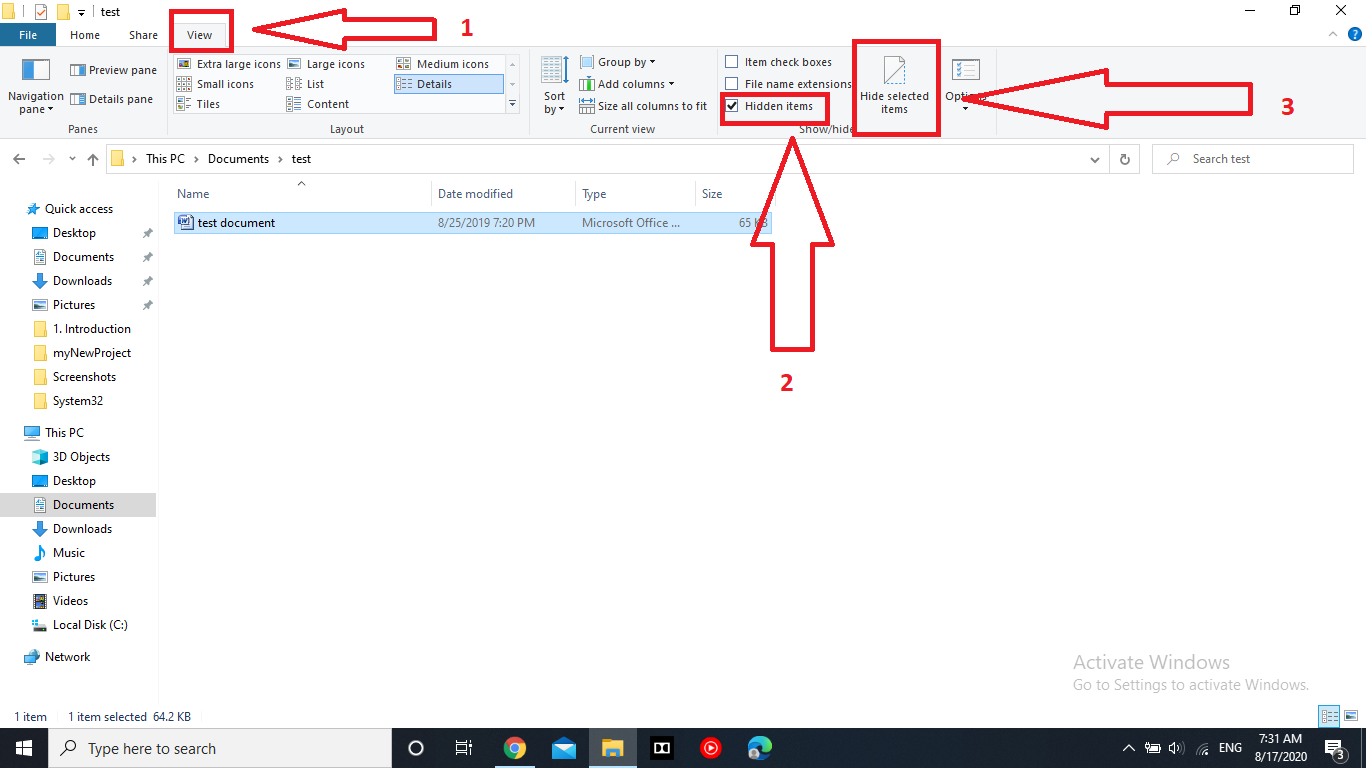
- Uncheck the “Hide selected items” option.
And now you have unhidden the files/folders in Windows 10 using File Explorer.
Final Words
We hope you found this simple tutorial on how to easily hide and unhide file folders in Windows 10 easy to understand. In case of any questions, feel free to comment below and we will help you out.

