Creating a YouTube channel can open doors to sharing your creativity, building a personal brand, or even starting a business. With over 2 billion monthly active users, YouTube offers endless opportunities for individuals and organizations alike. Whether you want to share your passions, educate others, or entertain viewers, setting up a channel is the first step. This guide will walk you through how to create a YouTube channel and set yourself up for success.
 Why Start a YouTube Channel?
Before diving into the process, it’s important to understand why creating a YouTube channel can be beneficial:
- Reach a Global Audience: YouTube allows you to connect with viewers from around the world.
- Monetization Opportunities: Once your channel grows, you can earn money through ads, sponsorships, and memberships.
- Build Your Brand: A YouTube channel can establish your expertise or promote your business.
- Creative Outlet: Share your hobbies, skills, or stories in an engaging way.
Now, let’s explore how to create a YouTube channel step by step.
 Step 1: Create a Google Account
To create a YouTube channel, you’ll need a Google account. Follow these steps:
- Go to Google’s sign-up page.
- Enter your personal details, including your name, email, and password.
- Verify your account via email or phone.
If you already have a Google account, you can skip this step and move on to the next.
Step 2: Sign In to YouTube
Once you have a Google account:
- Go to YouTube.
- Click on the Sign In button in the top-right corner.
- Enter your Google account credentials to log in.
 Step 3: Create Your YouTube Channel
Now comes the exciting part—setting up your channel. Follow these steps:
- Access the Channel Creation Page:
- Click on your profile picture in the top-right corner.
- Select Create a Channel from the dropdown menu.
- Choose a Channel Name:
- Decide whether you want to use your personal name or a brand name.
- Click Create Channel to finalize.
If you’re creating a channel for a business or brand, consider setting up a Brand Account for more customization and management options.
Step 4: Customize Your Channel
Customizing your channel helps make a great first impression. Here’s how:
- Upload a Profile Picture:
- Use a clear and recognizable image—your logo or a professional headshot works best.
- Click on Customize Channel and then upload your profile picture.
- Add a Banner:
- Your banner is the large image at the top of your channel page. Use it to showcase your brand’s personality.
- Recommended dimensions: 2560 x 1440 pixels.
- Write a Channel Description:
- Go to the About section and write a compelling description.
- Include information about the type of content viewers can expect and any other relevant details.
- Add Links:
- In the customization menu, you can add links to your social media accounts or website.
 Step 5: Upload Your First Video
Now that your channel is set up, it’s time to start uploading videos. Here’s how:
- Click on the Create button (a camera icon with a “+”) in the top-right corner.
- Select Upload Video.
- Drag and drop your video file or click Select Files to choose one from your computer.
- Fill in the video title, description, and tags.
- Choose a thumbnail (or upload a custom one) to attract viewers.
- Set your video’s visibility—Public, Private, or Unlisted.
- Click Publish to make your video live.
Step 6: Optimize Your Channel for Growth
To make your channel more discoverable and appealing, consider the following tips:
- Create Playlists:
- Organize your videos into playlists based on themes or topics. This keeps viewers engaged and increases watch time.
- Use SEO-Friendly Titles and Tags:
- Include relevant keywords, such as “how to create a YouTube channel,” to improve search rankings.
- Add a Channel Trailer:
- Create a short video introducing your channel to new visitors.
- Engage with Your Audience:
- Respond to comments, ask for feedback, and build a community around your content.
 Step 7: Promote Your Channel
Growing your channel requires consistent promotion. Here’s how:
- Leverage Social Media:
- Share your videos on platforms like Instagram, Twitter, and Facebook.
- Collaborate with Other Creators:
- Partner with creators in your niche to reach new audiences.
- Encourage Subscriptions:
- Always ask viewers to like, comment, and subscribe at the end of your videos.
- Invest in Paid Advertising:
- Use YouTube Ads to target specific audiences and increase visibility.
Step 8: Analyze Your Performance
Regularly review your channel’s performance using YouTube Analytics:
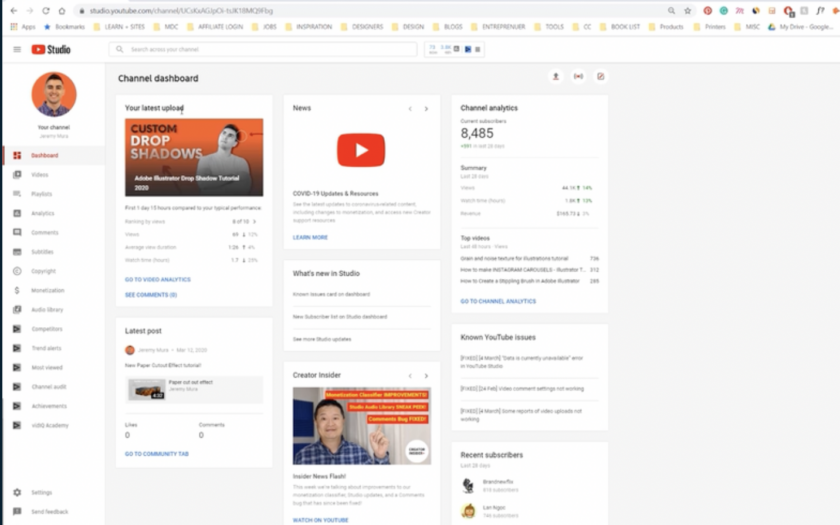
- Go to the YouTube Studio.
- Click on Analytics in the left-hand menu.
- Track metrics like watch time, audience demographics, and traffic sources.
Use this data to refine your content strategy and grow your channel effectively.
Tips for Long-Term Success
- Consistency is Key:
- Stick to a regular upload schedule to keep your audience engaged.
- Invest in Quality:
- Use good lighting, clear audio, and proper editing tools to enhance your videos.
- Stay Authentic:
- Be yourself, and let your personality shine through. Authenticity resonates with viewers.
Keep Learning:
-
- Stay updated on YouTube’s trends, algorithm changes, and best practices.
Conclusion
Learning how to create a YouTube channel is just the beginning of your journey as a content creator. By following the steps outlined in this guide, you can set up your channel, customize it, and start sharing your content with the world. Remember, success on YouTube doesn’t happen overnight, but with dedication, creativity, and persistence, you can achieve your goals. Start today, and let your voice be heard!


